Monday, April 29, 2013

Hanging Tobacco in the Barn

"Housing Tobacco"
16x20 oil on canvas
Burley tobacco is a very labor-intensive crop. The harvest is all done by hand. Because the leaves are so brittle, it can't be mechanized. The plants are cut down using a special tobacco knife that looks like a small hatchet. Then, using a sharp, cone-shaped, metal spike, five stalks are placed on a four-foot tobacco stick. The spiked tobacco is left in the field for several days so it will wilt and be easier to handle. Then it's loaded on trucks to be hung in barns.


The trailer loads of tobacco are pulled into the barn. Tobacco barns are designed with rows of wooden tiers about three feet apart, just the right width to hang the sticks of tobacco. 


Then the sticks of tobacco are handed up to the waiting men

who hang them on the tiers

or pass them on up to the guys above them.

Up and up they go,

over and over again,

all the way to the top!
The tobacco will stay in the barn for six to eight weeks to cure. The leaves turn golden brown. On damp, rainy days in October, it will be taken down, stripped from the stalks and packed in bales of various grades. 

"Up, Up, Up"
18x36 oil on canvas

Friday, April 26, 2013

Winter Work: Stripping Tobacco

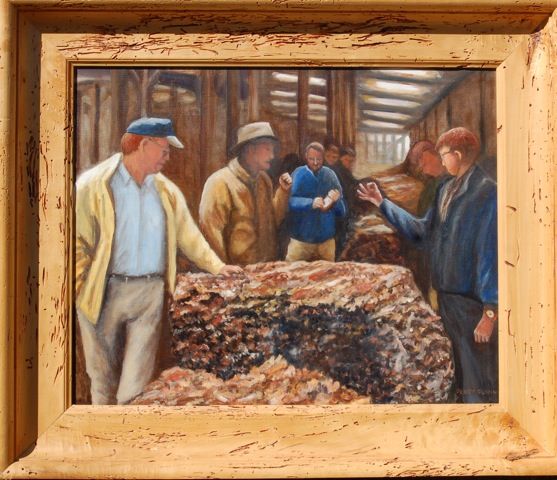
I've just finished these two paintings of workers on our farm preparing burley tobacco for market. The process is called "stripping" since the leaves are stripped from the stalk and sorted into grades.
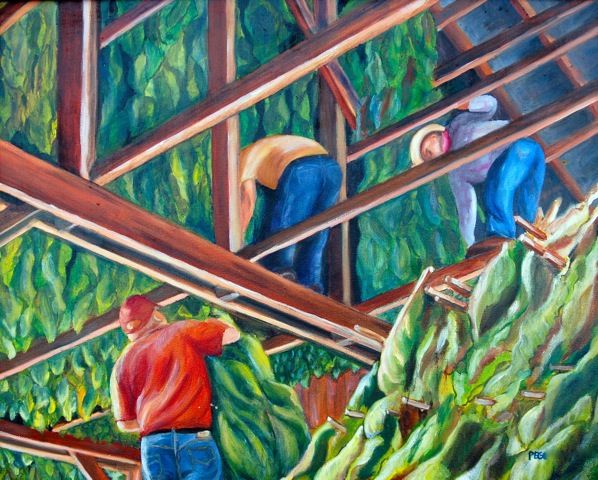
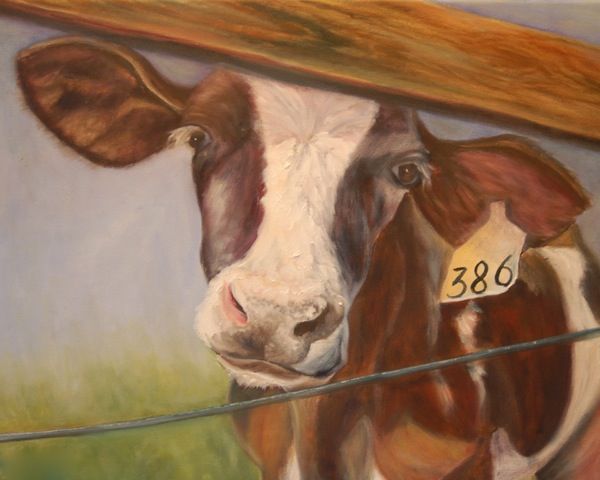
"Winter Work"
16x20 oil on canvas
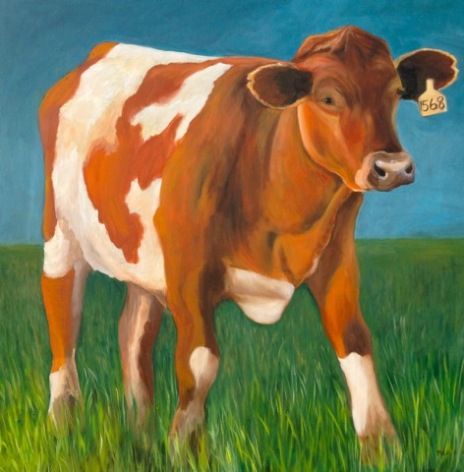
The painting above will hang over Pa's desk along with four others that tell the story of growing burley. The painting below will be a gift to the worker I painted.
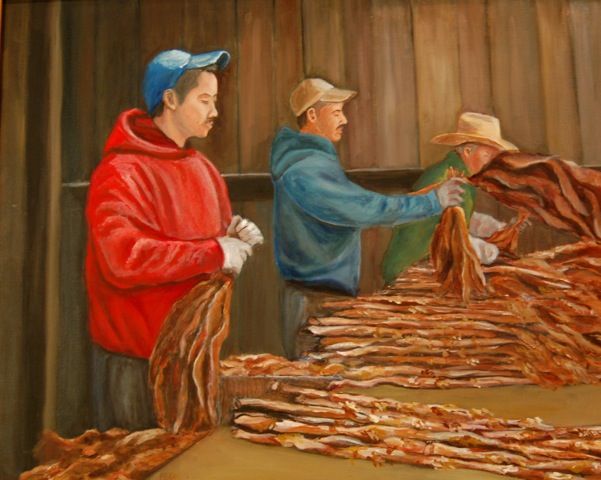
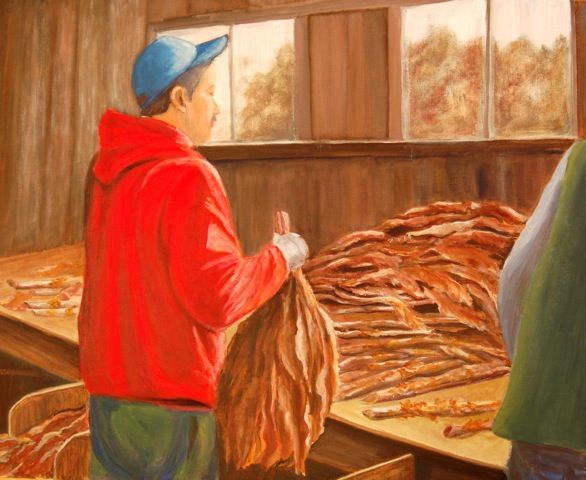
"Stripping Tobacco"
16x20 oil on canvas

Several years ago on another blog I detailed the process of stripping tobacco. Here is an exert from that post:

October 20, 2009

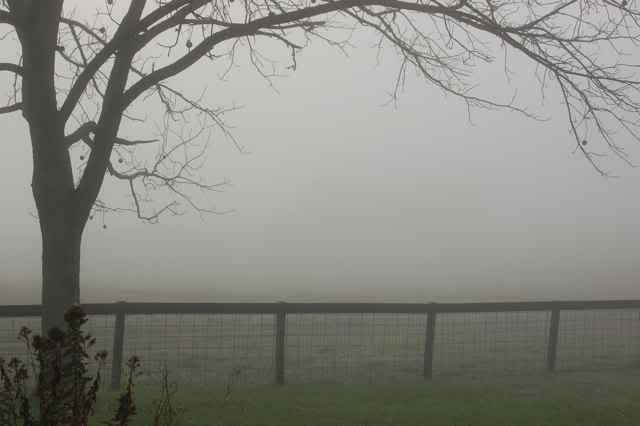
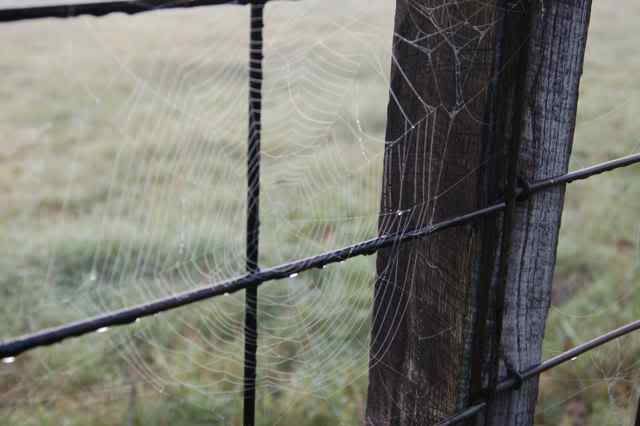
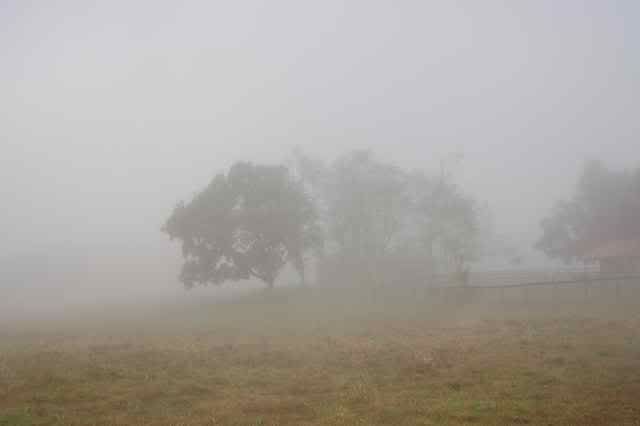
Yesterday was a foggy October morning so I ventured out with my camera...


crossed over the fence where I discovered a sparkly spider web,

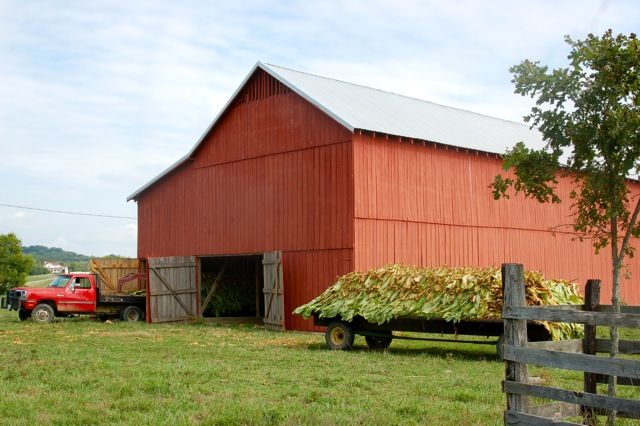
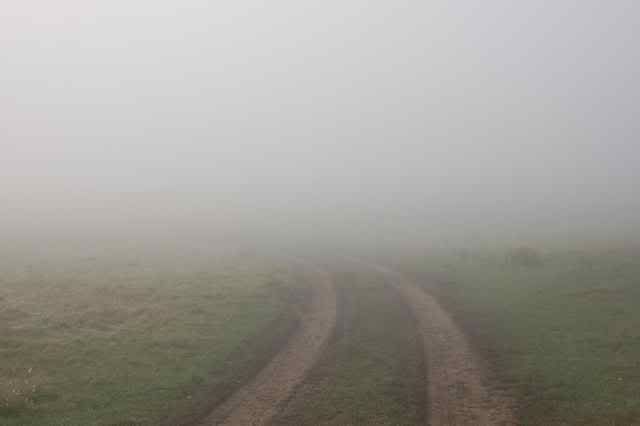
and headed up the path to the tobacco barn...


where I got to watch some G-rated "strippers."

Before you get too excited, I should tell you that the process of removing the leaves from the stalks is called stripping tobacco.

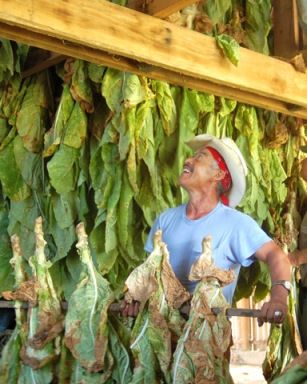
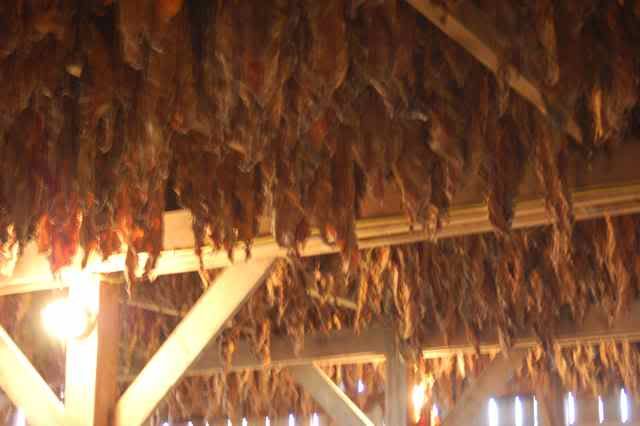
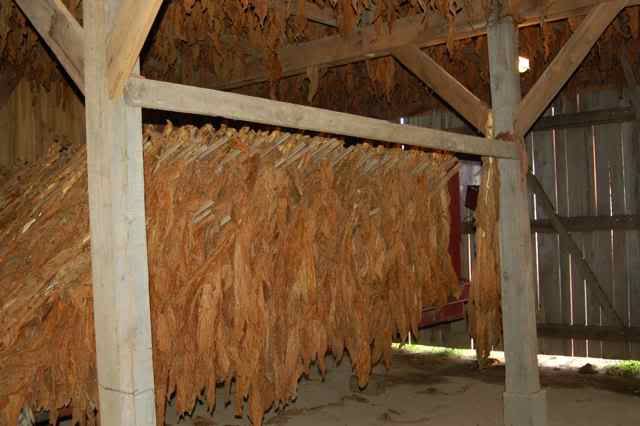
Back in August when the tobacco was hung in the barn, it was a yellowish green.  After two months or so in the barn, the leaves have turned a golden brown.

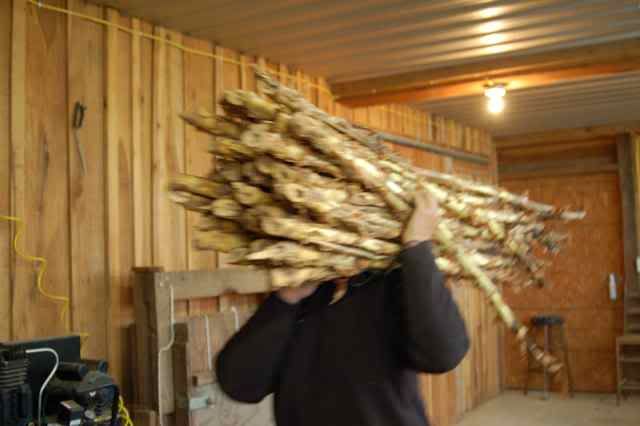
On damp, foggy mornings, tobacco takes on moisture or "comes in order" and becomes pliable enough to be taken down without crumbling. It's carefully stacked onto wagons and carried to the stripping room.

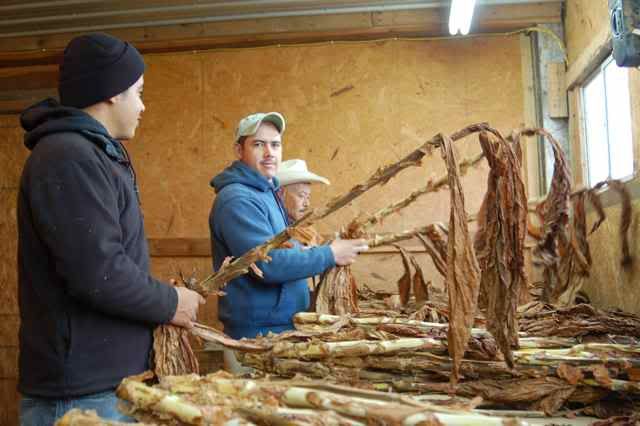
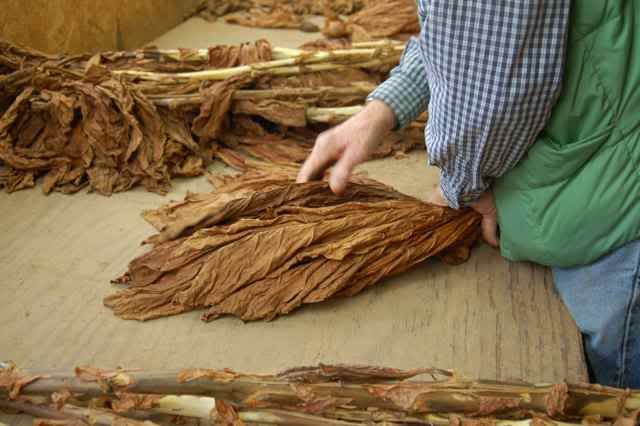
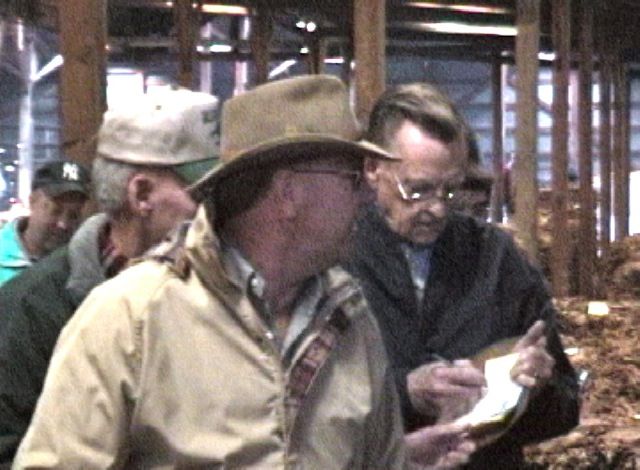
Pa and his workers remove the leaves from the stalks.

They sort the leaves into four grades according to color and stalk position.

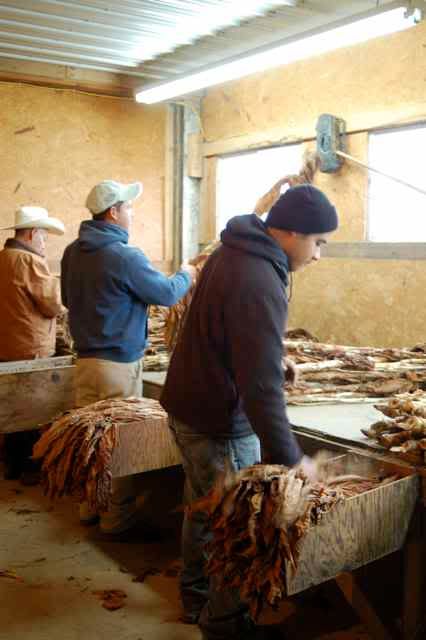
Each worker pulls off a different type of leaves and passes the stalk down the line.

They work under the watchful eye of their supervisor, Kate.


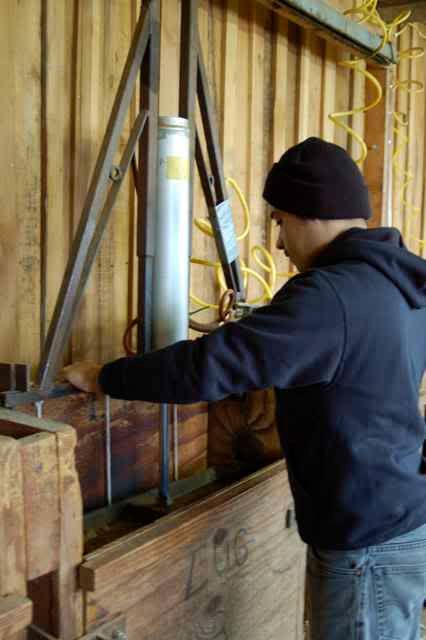
The piles of leaves are carried to specially-made baling boxes and stacked according to grades.


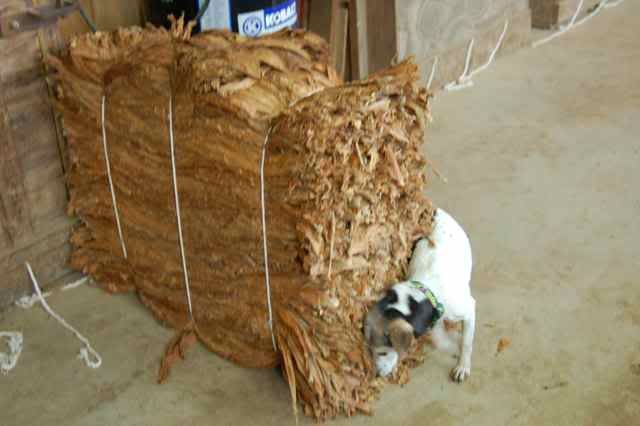
When a bin is full, the leaves are compressed into a bale with an air jack.

Kate finds the finished bales useful for scratching her back.

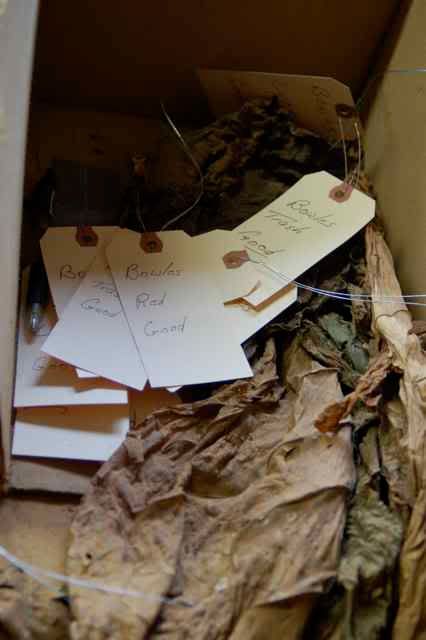
The bales are carefully tagged according to grade and quality.

Out go the empty stalks! They will be spread on the pasture land as organic fertilizer.


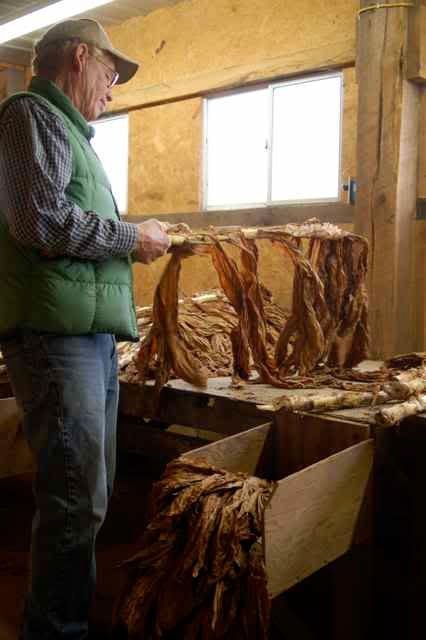
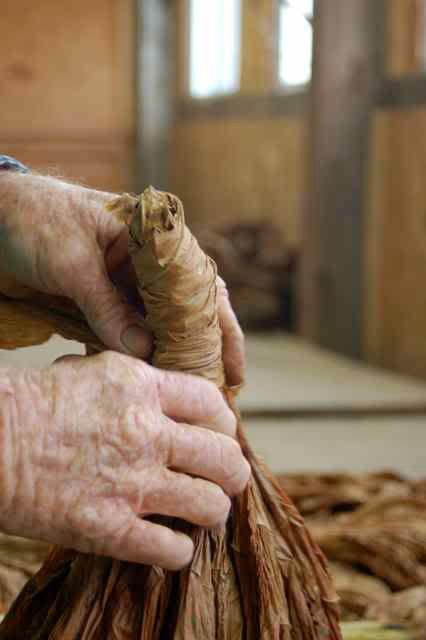
Tobacco has been sold in bales for only the past twenty years or so. Before that, it was stripped into bundles called "hands" of tobacco. While at the barn, I asked Pa to tie up a couple of the old-fashioned hands to hang up on the porch.

He gathered the leaves in his hand and carefully arranged them.


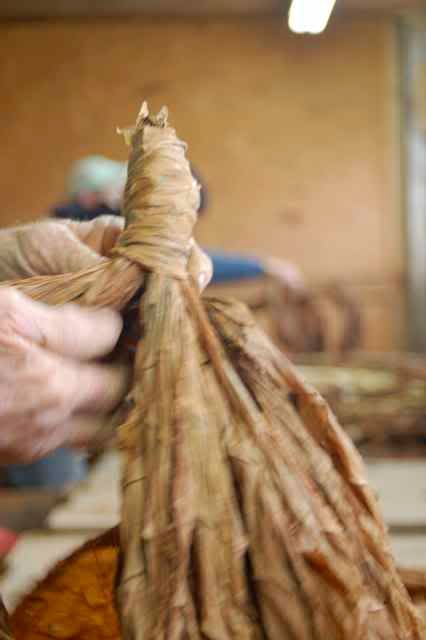
Then he took a single leaf and wrapped it around the stem ends of the leaves.

Finally, he tucked the wrapper leaf between the others in the bundle to secure it.

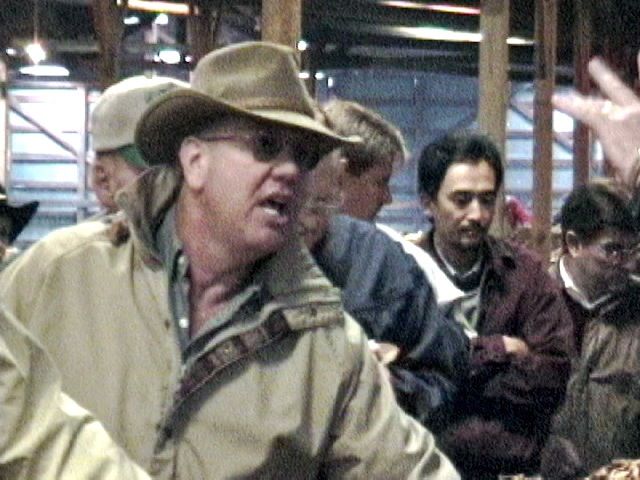
The hands of tobacco were artfully arranged on those big wooden tobacco baskets that are often found in antique shops today. In November and December, the crop was sold at auction in big tobacco warehouses located in almost every town. It was an exciting time of year for farm families. Now the crop is simply delivered to tobacco companies at receiving stations... the romance of a bygone era is only a memory.

Jenny Matlock
I'm linking this post to Alphabe-Thursday at Jenny Matlock's blog. W is for Winter Work!

Thursday, April 18, 2013

The Tobacco Auction

"Tobacco Auction"
16x20 oil on canvas
For many, many years, tobacco was sold at auction. Many towns across Kentucky, Tennessee, North Carolina, and Virginia had tobacco warehouses where the crop was brought to be sold in November and December. During the 1990s, Pa co-owned and ran a tobacco warehouse. It is closed now, but this movie clip was taken at one of the last auctions there.


For some reason, the Quicktime movie above may not be visible on an iPad, so here's a photo. 
But you'll miss the chant of the auctioneer saying,
"SOLD to Phillip Morris!"

While the auctioneer had the most vocal job at a tobacco auction, the man behind him had the most difficult one. The ticket marker listened to the chant and recorded the buyer, the price and the grade of each pile of tobacco. He wrote that information on the ticket, all the while listening to the auctioneer selling the next pile. That took a lot of concentration and an assistant to place the tickets on the piles.


Due to federal legislation, tobacco is now contracted with the tobacco companies before it is grown. At the end of the year, it is delivered to a receiving station run by the company. Farmers receive payment for their year of hard work, but somehow it's just not as exciting. The romance of the auction is a thing of the past.


Friday, April 12, 2013

Daffodils mean it's undoubtedly spring!

After several weeks of cold weather, today the sun is shining and the daffodils are blooming. It's finally  spring! Buttercups, jonquils, daffodils, narcissus... whatever you prefer to call them, they are undoubtedly one of my favorite flowers. I am lucky to have several varieties that were given to me by my mother. 

I don't know the names of most of them, but this one is Thalia. It is creamy white and sweet smelling. Thalia often has two or more blooms on a single stem. I love the little glass basket too. It was my mother's and I can remember filling it with buttercups when I was a child.

This little narcissus blooms profusely with three or four flowers on a stem and a wonderfully strong fragrance that means spring to me!

Another white daffodil, this one has a ruffled pink trumpet.

 photo file_zps70496037.jpg
16x20 oil on canvas
Several years ago I did this painting of an arrangement of daffodils from my yard. It hangs in my kitchen so I can enjoy "spring" all year long. Can you find the varieties in the photos above? 

Daffodil Tips and Tricks

One of my favorite things about buttercups is that they return each year with no effort on my part! All I have to do is remind Pa not to mow down the foliage until it turns brown in late June or July. Daffodils use the foliage to store food in order to bloom the following year. If they are mowed down too soon, they will not continue to bloom! 

Another nice thing about daffodils is that the bulbs can be dug up and shared with others. Wait until they have finished blooming, preferably when the foliage has died down, to dig them. Then plant the bulbs 4 to 6 inches in the ground. Add a little bone meal to fertilize them. Next spring, they'll bloom and will return each year. Easy!

A vase with a narrow opening works well with buttercups. If you want to use them in an arrangement that requires floral foam or oasis, insert a floral pick or a toothpick in the hollow of the stems to make them more sturdy.

Jenny Matlock 
 I'm linking this post to Jenny Matlock's AlphabeThursday... for daffodils mean it's undoubtedly spring!!!

And I'm linking to Tutorials, Tips and Tidbits at Stone Gable.

Saturday, March 23, 2013

Nosy Rosy

And a Workshop on Perspective

My weekly art class takes a month-long "spring break" in March, but our instructor, Charles Brindley,  held a workshop at his art studio in Adairville, Kentucky. It was all about perspective, a subject that has sometimes baffled me. We discussed two kinds of perspective, atmospheric and linear. 

"Nosy Rosy"
16x20 oil on canvas
SOLD

Atmospheric perspective describes lines and objects as they move deeper into the picture. In other words, things in the distant background (like the grass in the painting above) will be less distinct.

Linear perspective, the kind that gives me fits, is absolute; it never changes. You find "eye level" in an object or scene. The further above or below your eye level, the more the horizontal lines slant. Lines above eye level slant down as they move into the distance; lines below eye level slant up. Eventually, all the lines meet at a vanishing point. Confused? So was I! The good news is that you don't have to have perfect perspective in a painting. Just have an understanding of the concept to make things "look right."

I painted Nosy Rosy several years ago and sold her at a local art show. In light of my recent lesson, I think the painting illustrates perspective. "Eye level" is somewhere between Rosy's eyes and nose so the wooden fence slants down as it moves farther away to the right. The wire below eye level slants up as it moves into the distance.

Clear as the mud Rosy was standing in???

Okay, I admit it... that grass in the background was NOT there in the reference photo, but Rosy and I like it better in the painting. Could we be hoping for spring soon?

I'm linking this post to Jenny Matlock's Alphabe-Thursday because R is for Rosy! 

Jenny Matlock

Thursday, March 14, 2013

Where's the Beef?

Out strolling in Pa's field, of course! I finally finished my first painting from some photos I took of his colorful steers last fall. Then I went to the art store to buy another canvas for a second steer.
30x30 oil on canvas
So... there's beef in the field and on canvas, but it's also in my big blue Le Creuset pot. My daughter made these wonderful beef short ribs when I visited my new granddaughter. They were so good that I came home and made them for Pa. The recipe is easy. You simply brown the meat, add a few ingredients, and pop them in the oven on low heat so they cook slowly. Served over egg noodles, they are delicious! While they're cooking, I can paint another big steer!

Sunday, March 10, 2013

Summer Memories

I finished another small painting of my granddaughters on the beach last summer. They were having a conversation when a big wave splashed over them. I wish I knew what they were discussing!
11x14 oil on canvas
It will hang in my daughter's guest room along with the painting below. I made a few changes to it and calmed the sea a bit.
11x14 oil on canvas
When my granddaughters see these paintings, I hope they remember the fun they had on the beach that day!


Thursday, March 7, 2013

Basic Oil Paint Colors to Paint Anything!

 If you've been thinking of trying your hand at oil painting, you may have hesitated because of the price of artist oil paints. There are so many beautiful colors, but the good news is that you don't have to buy them all. With a few basic colors, you can mix any color you want! Here are eight basic colors... add some white and that's all you'll need to paint just about anything!

If you are buying oil paints for the first time, I suggest that you do not buy "student grade" paints because they don't have enough pigment and you will not be happy with them. You will eventually purchase "artist grade" paints to replace the "student grade" colors. Make it easy on yourself and buy the better paints first.

Some artists prefer a particular brand of paint, but two reasonably priced brands are Gamblin and Winsor Newton. Winton is Winsor Newton's "student grade" and as I said, spend a little more to get artist grade paints!

All the images in this post are from Artist Supply Warehouse's website.
They have good prices and lots of sales so it is a good place to order paints.
You may also like Dick Blick or Jerry's Artarama.


Every artist needs two versions of each primary color: red, yellow, and blue... a cool one and a warm one. The prices listed are for 37 ml tubes of paints. Some are Winsor Newton and others are Gamblin, both of which happen to be on sale currently at ASW.

My basic reds are Cadmium Red Light, a warm orange red, and Alizarin Crimson, a more bluish red.

Cadmium Red  $19.16
Alizarin Crimson $8.90


Basic blues are Ultramarine Blue and Phthalo Blue (a.k.a. Winsor Blue in the Winsor Newton Line). Ultramarine combines with white to make a beautiful warm blue sky. Thalo is a cooler blue which makes a lovely turquoise, but be careful... this color is very strong! 

Ultramarine Blue (Gamblin) $8.96


Phthalo Blue (Gamblin) $8.96


The basic yellows are Cadmium Yellow Light, a warm orange-y yellow, and Yellow Ochre, a cool greenish yellow. Both combine beautifully with Ultramarine Blue to make greens for trees and grass so there's no need to purchase a tube of green paint. Of course, you can add a little white to make a lighter green or you can vary the percentages of yellow and blue to get the green you want. Other interesting greens can be made by mixing either yellow with Phthalo too.
Yellow Ochre $6.47
Cadmium Yellow (Light) $19.16


Add to those six primary colors a couple of neutral browns and you can make almost any color you'll ever need. Burnt Sienna mixes with the reds to make wonderful wood tones.

Burnt Sienna $6.47
Burnt umber combined with Ultramarine Blue makes a great black so don't buy a tube of black paint. Add white to the mixture and you get shades of gray.
Burnt Umber $6.47
You will need to purchase white paint. Consider buying a larger tube since you'll use lots of white to mix with other colors. I like Titanium White which is more opaque. I also buy large tubes of Permalba brand white. I love the buttery texture of Permalba and it is more transparent so it makes a beautiful sky. If you do an underpainting of pink, Permalba allows a bit of that color to show through for a pretty blue sky with touches of pink!
Three 150 ml tubes of Permalba White $22.94

Amazingly, you can even combine a few of these basic colors to get beautiful skin tones... a little cad red, cad yellow, burnt sienna, and a good bit of white. Play around with the percentages until you get the tone you want.

I have a few other colors of oil paints in my box but frankly, I don't use them much. These are the ones I reach for, time and time again. As you can see, none of these colors is terribly expensive except for the two cadmium colors.

If you've always wanted to paint, please read my earlier post "Do You Wish You Could Paint?" I truly believe anyone can learn to paint. Like playing a musical instrument, painting takes practice, and lessons really help to improve your skills. I've been painting for seven years now... still learning and growing as an artist. I always thought painting required talent and I was reluctant to try it... but I can paint and so can you! Begin with the basic paints that I've listed above.

I'm linking this post to Jenny Matlock's Alphabe-Thursday because P is for Paints! When you visit her blog, be sure to look at the beautiful signs Jenny paints! If you are an artist, I hope you'll add a comment and share your favorite oil colors too!

Jenny Matlock