Thursday, May 23, 2013

Another big steer

This time I painted a white steer, probably a Charolais with a bit of Brahma in his background. 
30x30 oil on canvas

He was in the same group of steers as this colorful one I painted a few months ago.

30x30 oil on canvas

When I propped the finished paintings against the fence to photograph them, I was pleased to see that the grass in the paintings blends right in with the real stuff on the ground!


I think they make a nice pair!

Thursday, May 16, 2013

Inspiration for Art in the Garden

With beautiful spring weather finally here and plenty of April showers continuing in May, I can find inspiration for art right outside my back door!

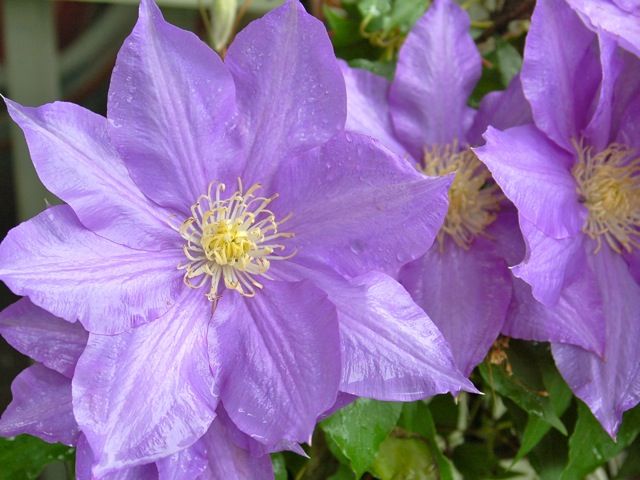
This clematis vine is in full bloom. At last count, there were 22 flowers

and they're HUGE! This might be a painting to try soon.

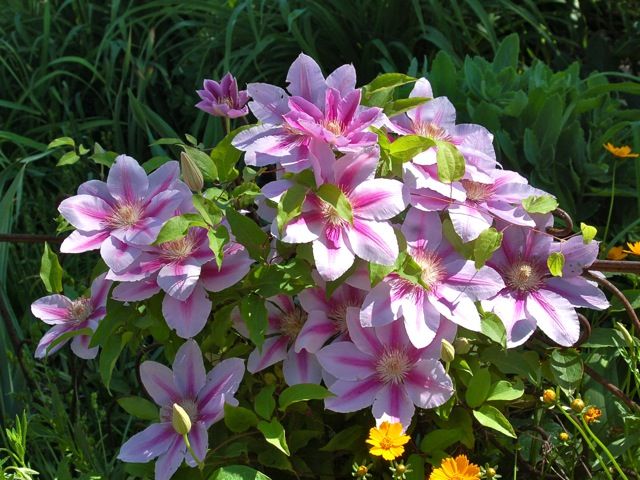
On my patio, there's another variety. Clematis is showy but easy to grow. The plants need a trellis or something to climb. They are best planted near a foundation since they like their roots cool. This one is next to my patio so the roots hide there.

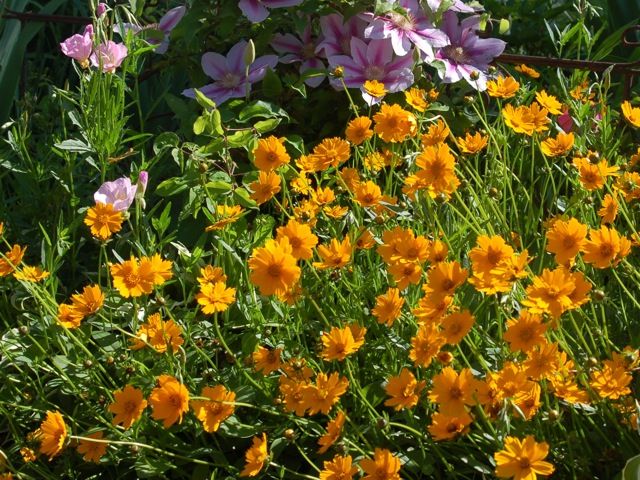
Coreopsis has a profusion of bright golden blooms that nod gently in the breeze.

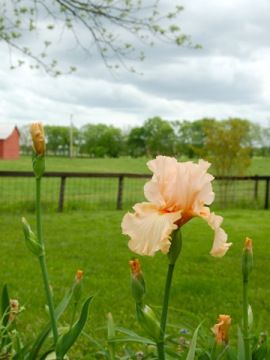
Several years ago, my watercolor instructor gave me this ruffled peach iris.

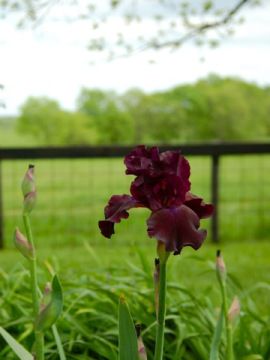
Cheri gave me this deep dark purple iris too. 
Her watercolor paintings of iris are gorgeous, just like the flowers she shared.

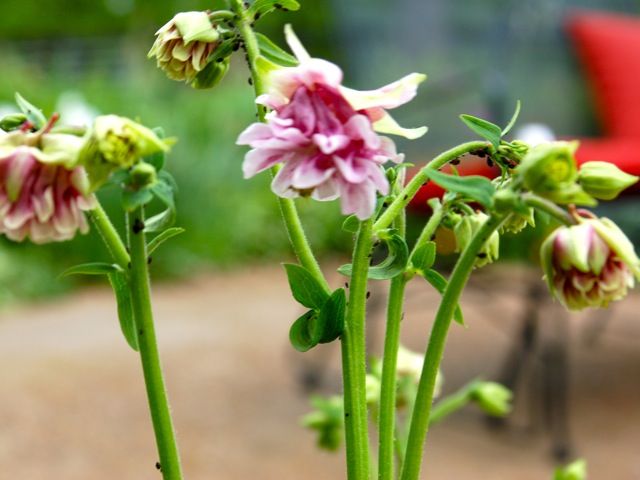
I love columbine! It reseeds itself and surprises me all over the garden. I once had several varieties but the bees have cross-pollenated them so they all look alike now. 

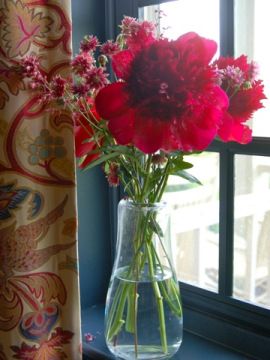
My favorite flower in the garden is this red peony. It's always the first peony to bloom and looks wonderful in an arrangement. I see another painting here!

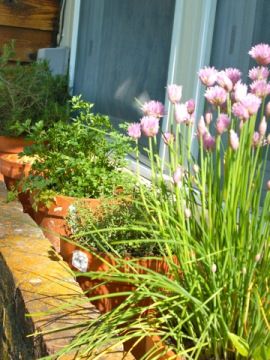
The herbs in my porch box are doing well too. They might even inspire me to cook! This year I planted parsley, thyme, and dill to use in this herbed chicken salad recipe from the Stone Gable blog. We tried it for my granddaughter's christening party and it is so good! The puff pastry cups are cute too.

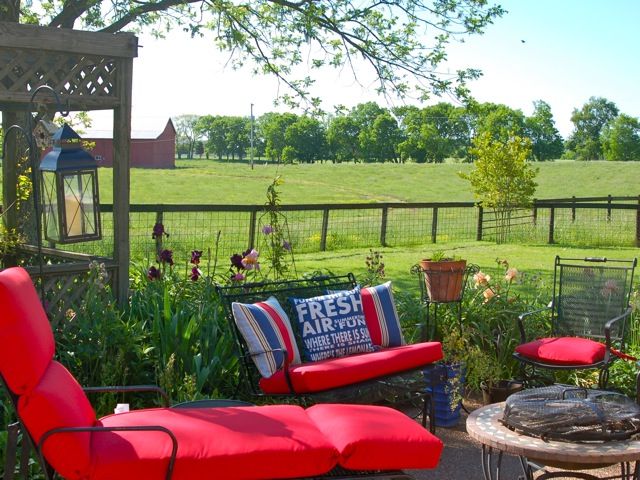
Speaking of my new little granddaughter, she's coming to visit this week. I decided that was a good-enough reason to spruce up the patio a bit so I sprayed all the wrought iron with black Rustoleum paint and ordered some new Sunbrella cushions from Home Depot.

Do you think she'll notice?

Sunday, May 12, 2013

The Original Four Seasons of Tobacco

Many years ago I saw a brochure featuring a group of drawings or paintings called "The Twelve Months of Tobacco."  The artist, Toss Chandler, was commissioned by Philip Morris, Inc. to depict the tasks necessary to raise a crop of tobacco from planning it in January to selling it in December.  I looked for prints of the series but never found them, so when I first started painting, I decided to try to paint something similar. Not wanting to do twelve paintings, I cut it down to the "four seasons of tobacco."

"The Four Seasons of Tobacco"
four 16x20 oil on canvas
Over the years as my skill as an artist has improved, I have repainted the series and even added a fifth painting. However, the painting below has only been retouched. There is a reason for that... 

"Tobacco Auction"
16x20 oil on canvas

At the time I painted the tobacco auction, I was taking art lessons from a wonderful portrait painter. She commands portrait fees in the four and five figure category, depending on the size of her finished work. The auction painting was the first time I'd tried to paint faces; they're so difficult! My teacher felt sorry for me and offered to paint Pa's face so it would actually look like him. She did a beautiful job! I was so excited to show it to Pa. I had a painting that was partially done by a master portrait artist!

He took one look at the painting and said, "My chin doesn't really look that bad, does it? Take it back and ask her to fix my chin!" So there I was, taking a portrait that my teacher had painted for free back to a portrait painter who gets big bucks for her work!

When I told her what Pa had said, she laughed. "Men are so vain!" she said as she made him look ten years younger. Pa was one happy man! And needless to say, I'm not going to attempt to repaint that one until I, too, become a master portrait artist... and I don't see that happening anytime soon!

In these posts, you can see the four paintings I painted recently, replacing three of those above, and read about the process of growing burley. To learn more about how tobacco was sold, click the last link.


Friday, May 10, 2013

Planting and Plowing

"Setting Tobacco"
16x20 oil on canvas
Burley tobacco is planted or set in late May.


The seedlings are grown from seed in a greenhouse where the styrofoam trays are floated in water.


A tobacco setter is pulled through the plowed field behind a tractor. There are seats for four men and a tank for water.

The setter has two rotating wheels with slots.

As the wheels turn, the men take turns placing a seedling in each slot.

They have to work quickly to place each seedling at just the right place so that it will be mechanically planted at the correct depth. Otherwise, the plant will not live.


As the machine plants each seedling, it gets a squirt of water with fertilizer.

Up and down the field, the setting crew works

planting two rows at a time.

If a seedling doesn't live, it has to be replaced the hard way... by hand!

The plants grow quickly. By early June, it is time to plow.


Plowing is a slow and tedious job. Pa is very picky and usually does all the plowing himself.


He adjusts the plow so it cultivates the plants at the right depth.


The crop will be fertilized, sprayed for disease, and topped to prevent suckers. By late August, it will be 5-6 feet tall and ready to be cut.


Monday, May 6, 2013

Burley Tobacco Harvest

"Cutting Tobacco"
16x20 oil on canvas
Burley tobacco is ready to harvest in late August, the hottest part of the summer! Because the leaves are fragile and break easily, the crop has to be cut by hand.

Workers use a small knife that looks like a hatchet.

Wooden sticks about 4-feet in length are distributed through the field.

A metal cone-shaped "tobacco spike" is placed on top of the stick to provide a sharp point.


Then stalks of tobacco are forced over the spike, splitting the stalk.
Five stalks are placed on each stick.

The process is called "spiking" tobacco.

The tobacco is usually left in the field for three days to wilt and dry out.
Then it is loaded onto trucks and hung in a barn to cure.